Create a SQL Azure Database
For this example, we will create the following SQL Azure database:
- SQL Azure Server Name: axioworks-demo-server1.database.windows.net
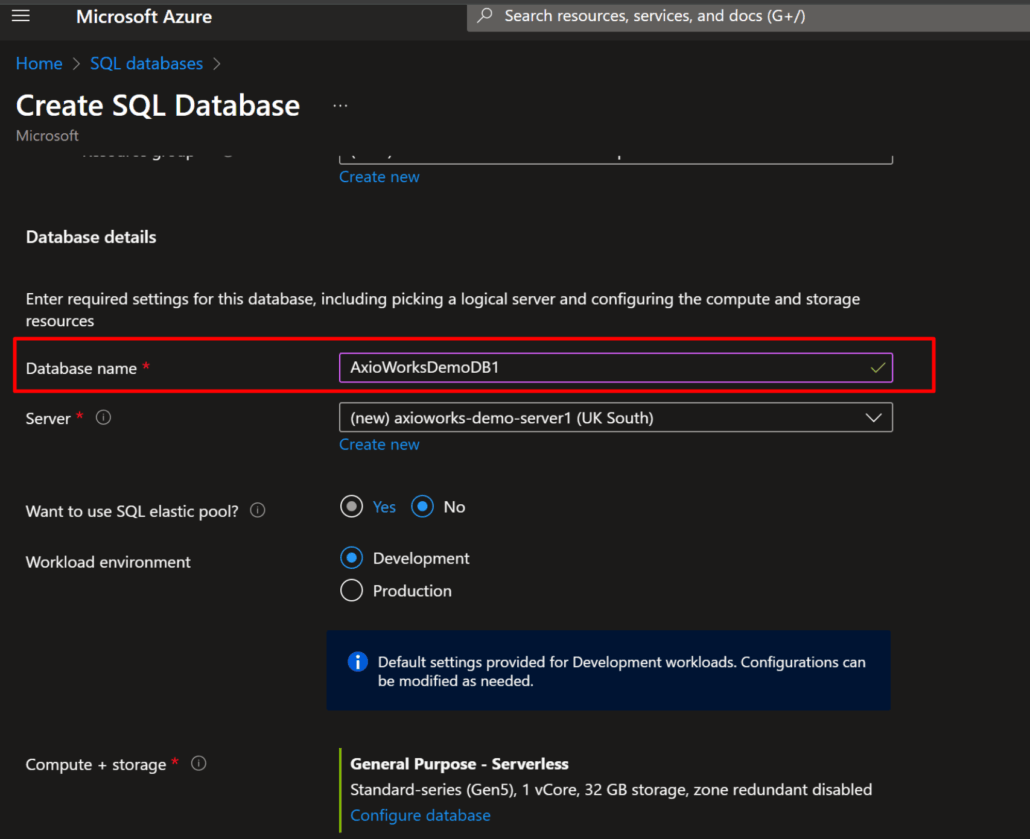
- Database Name: AxioWorksDemoDB1
- Authentication method: Microsoft Entra Only
And the following Entra ID App
- App registration name: axioworks-demo-app
Here is a short step-by-step guide to create a SQL Azure database:
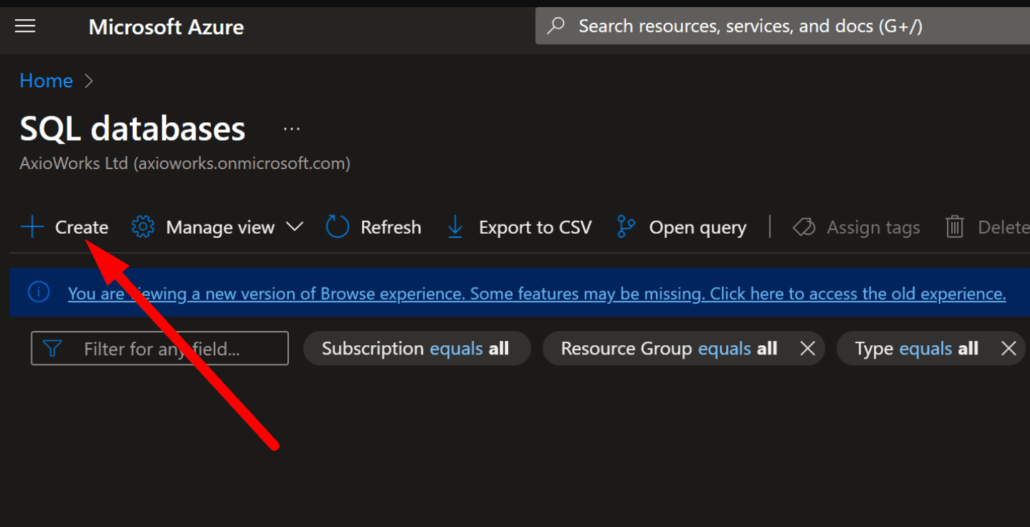
- Log in to the Azure Portal at https://portal.azure.com.
- Click “Create a resource” and choose “SQL Database”.
- Enter the database name and select or create a resource group.
- Create a new SQL server or select an existing one.
- Configure additional settings (e.g. compute tier, backup options).
- Review and create the database.
- Click “Create” to deploy the SQL Azure database.
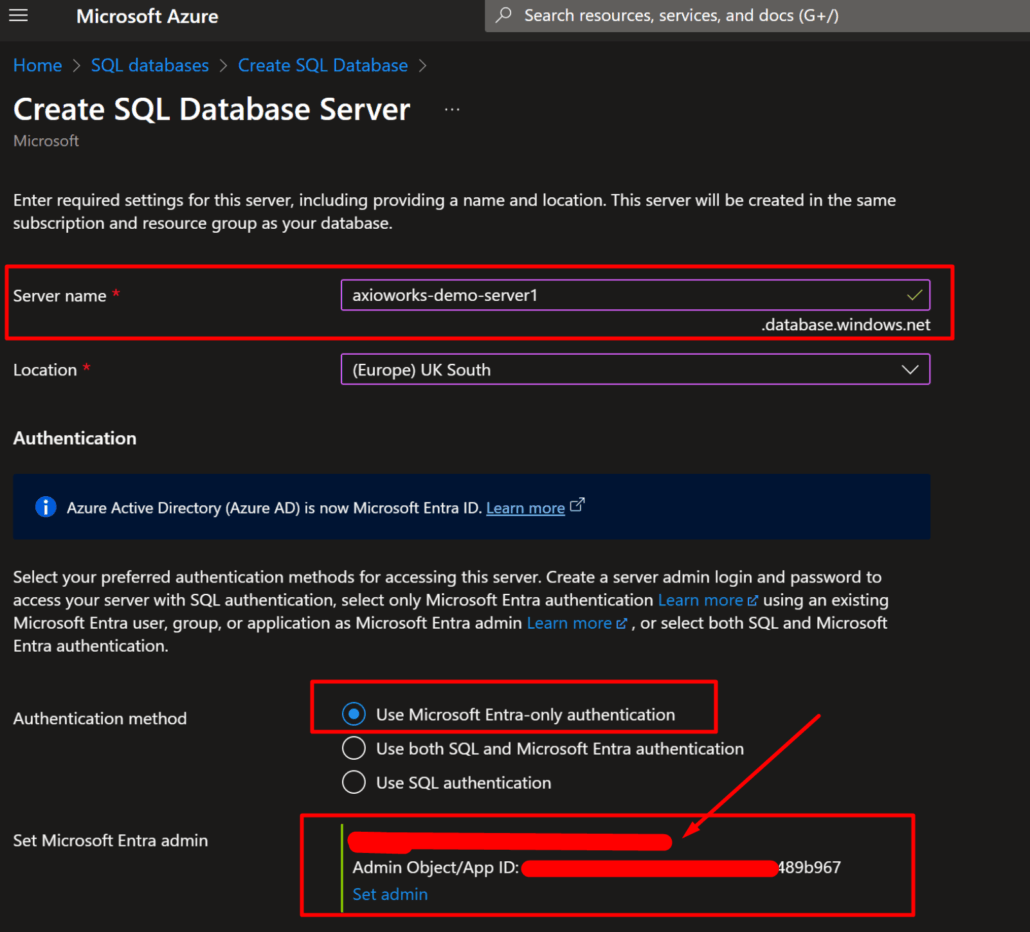
IMPORTANT: since we are using Microsoft Entra Only authentication, we will complete the configuration using the Microsoft Entra Admin account shown here. Use your preferred authentication method.
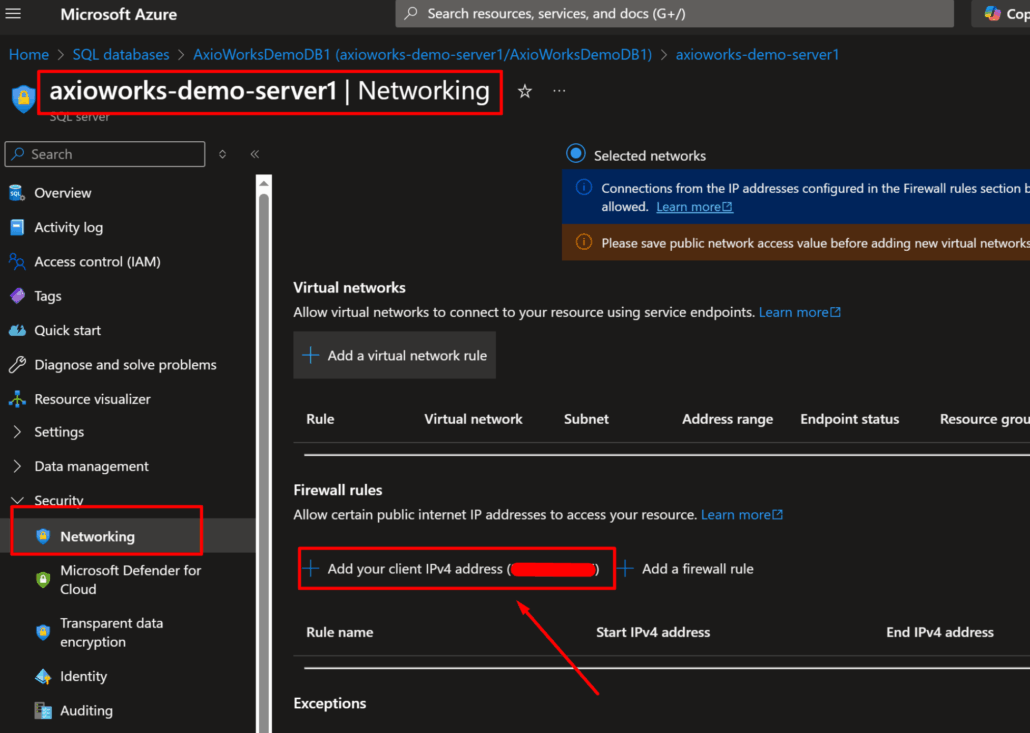
Configure Firewall
- Navigate to your SQL Server (not the database itself).
- In the left menu, select “Networking”.
- Under “Firewall rules”, click “+ Add your client IP”.
- Confirm the IP address and click “Save”.
Your IP is now allowed to connect to the SQL Azure server.
IMPORTANT: you will need to add the IP address of the machine running SQList to configure the replication for this database.
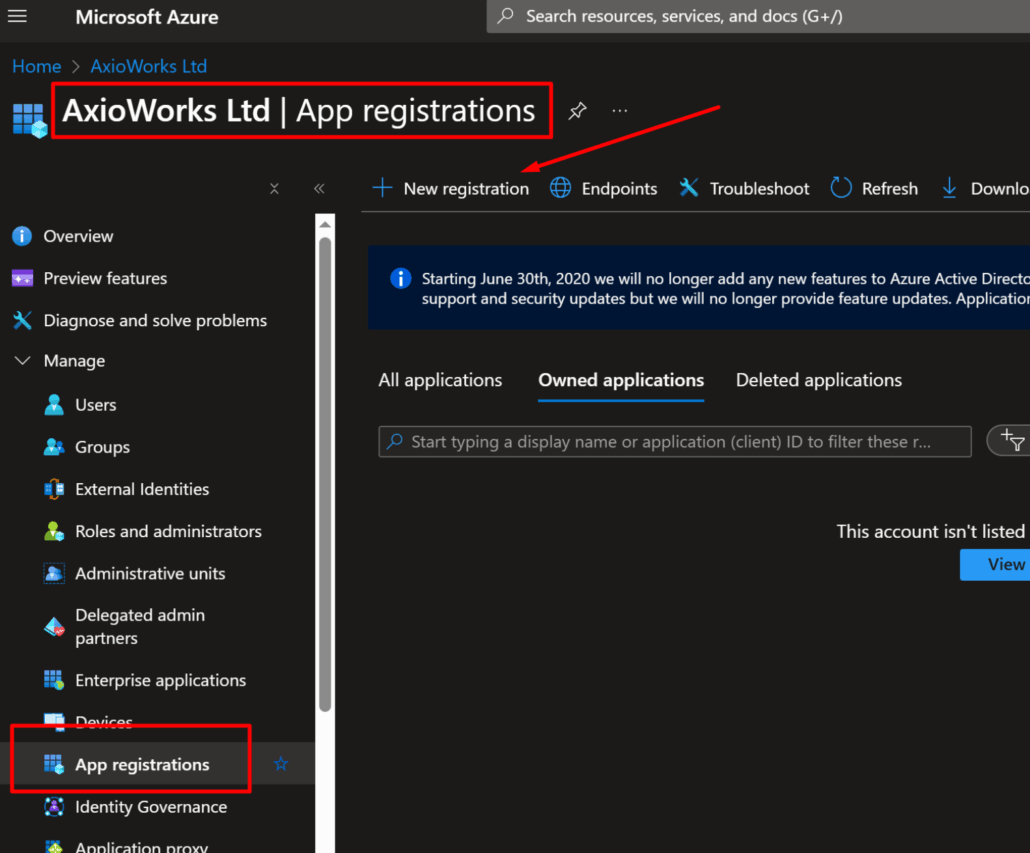
Create the Azure AD App Registraion
Create the App Registration
- Select “Microsoft Entra ID”;
- Under “Manage”, click “App registrations”;
- Click “New registration” and enter the following:
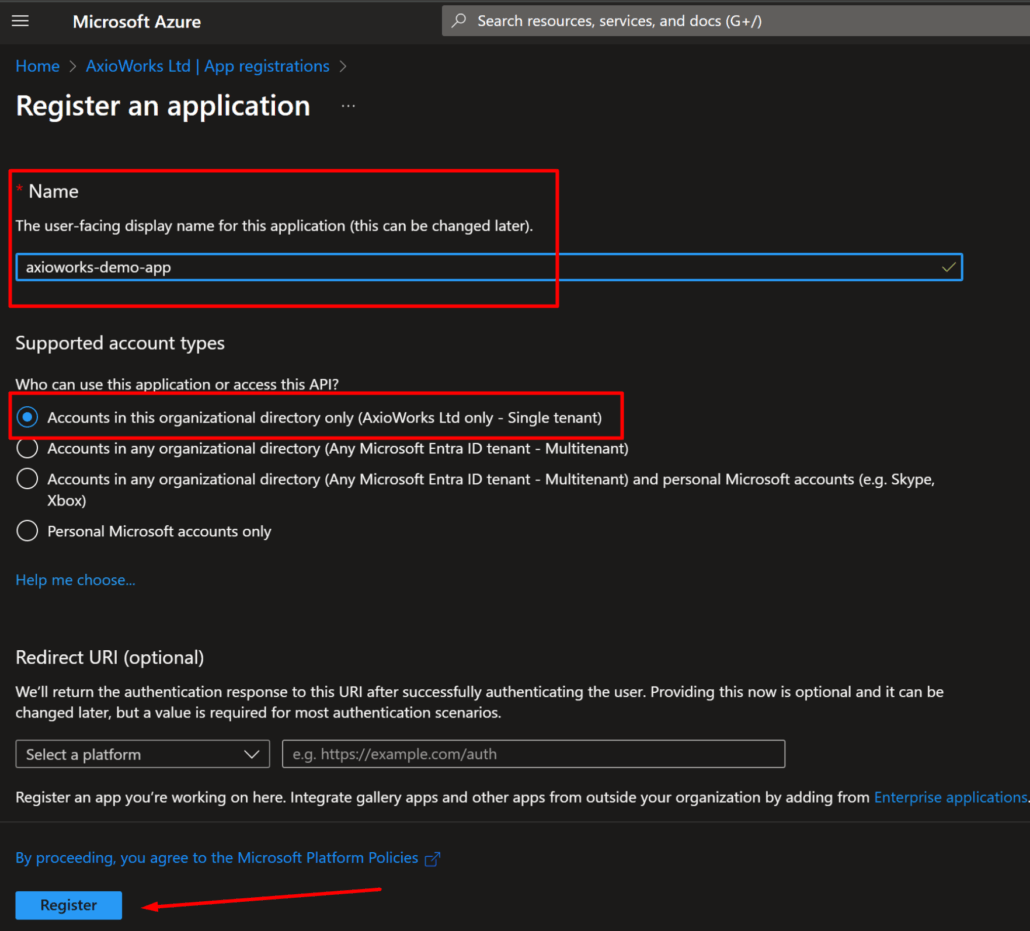
Name:axioworks-demo-app
Supported account types: choose as appropriate (usually “Accounts in this organisational directory only”)
Leave the Redirect URI blank (can be added later if needed). - Click “Register”.
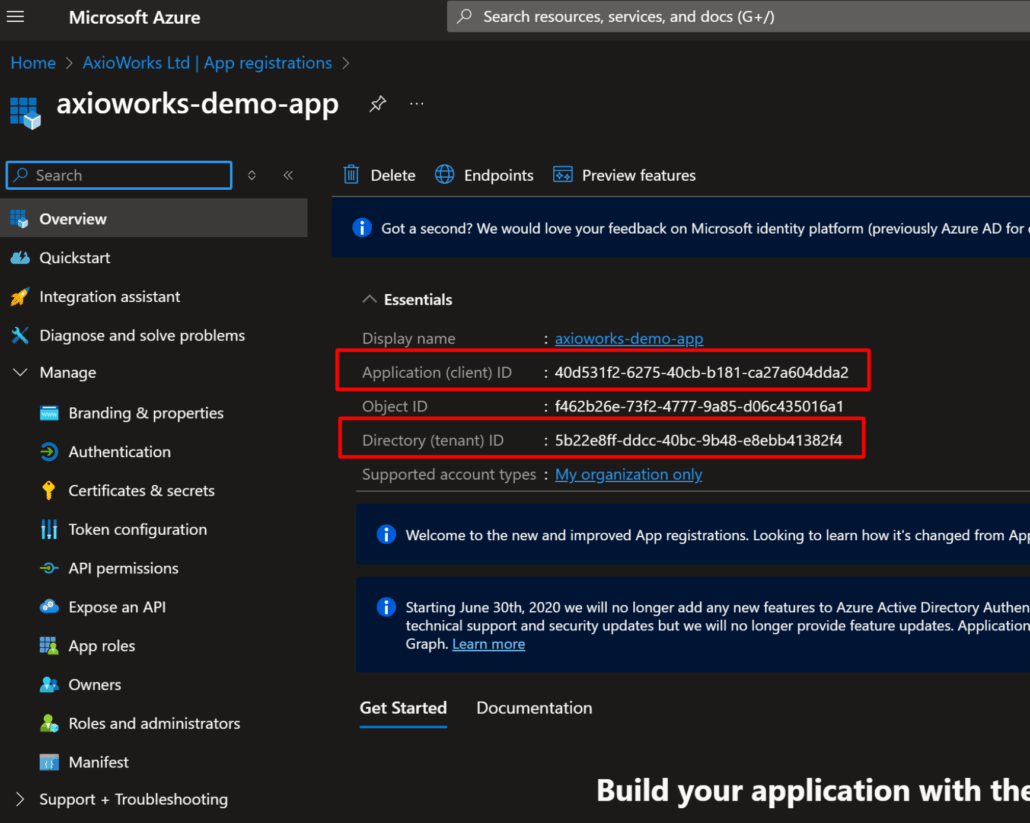
Once the application is created, take note of the “Application (client) ID” and “Directory (tenant) ID”, you will need them to create the connection in SQList.
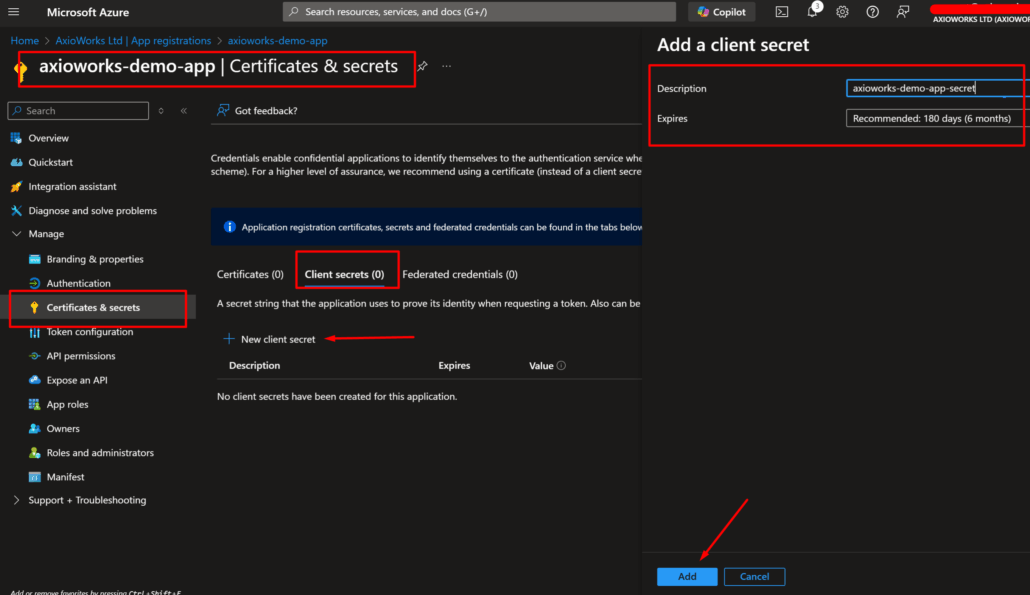
Create a Client Secret
- Go to “Certificates & secrets” under the app menu;
- Under “Client secrets”, click “New client secret”;
- Enter a description (e.g. AxioWorks SQList Client Secret) and choose an expiration period;
- Click “Add”.
IMPORTANT: Copy the value of the secret immediately – it will not be shown again.
Connect to the New SQL Database in SSMS and Complete the Database Configuration
Connect to the Database Using SSMS and Microsoft Entra Admin
- Open SQL Server Management Studio (SSMS).
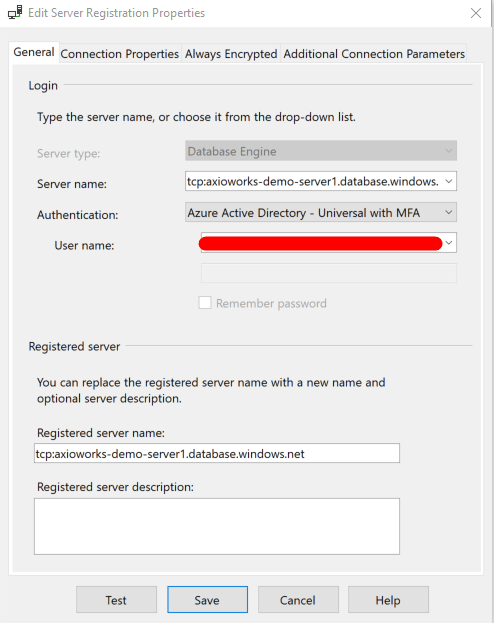
- In the Connect to Server window:
Server name:tcp:axioworks-demo-server1.database.windows.net;
Authentication: Azure Active Directory – Universal with MFA;
User name: use the email address of the Microsoft Entra Admin.
Click Connect and complete the MFA authentication prompt.
Run the Configuration T-SQL
Once connected, open a new query window on the AxioWorksDemoDB1 database and run the following T-SQL to create the Entra user and assign permissions:
CREATE USER [axioworks-demo-app] FROM EXTERNAL PROVIDER;
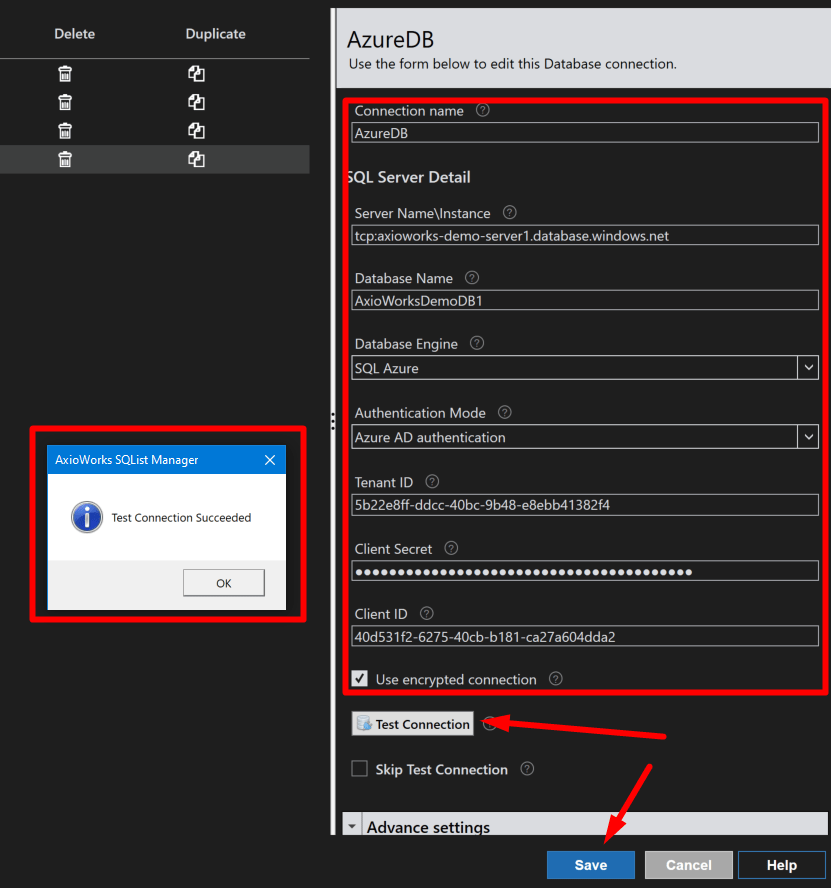
ALTER ROLE db_owner ADD MEMBER [axioworks-demo-app];Create the Database Connection in SQList
To establish the database connection in SQList, create a new database connection, input the details gathered earlier, and save the configuration. At this stage, you can replicate your SharePoint list to the new SQL Azure database.