The enterprise gateway provides the facility to access data into the Power BI that reside on an on-premises network, it validates connection request and allows access to only those users’ requests which meets certain criteria. It also secures data, password and access request by doing encryption and compression of the data which passes through it.
Power BI Gateway Types to use with SharePoint data
Power BI On-premises data gateway (Personal mode)
This type of gateway can’t be shared with others and only allows one user to connect to data sources. Also, it can only be used with Power BI.
The Personal mode gateway will only be used for on-demand refresh and scheduled refresh.
Power BI On-Premises data gateway (Enterprise)
: In this type of gateway, multiple users can connect to multiple on-premise data sources. This can be used with the Power BI, Power Apps, Flow and Azure Logic Apps.
In case of the Power BI, this gateway will support both for scheduled refresh and Direct Query.
“Both the gateways perform similarly – they provide the facility to access data into Power BI, which resides on an on-premise network, but personal gateway which is used by a person with only Power BI, the On-premises data gateway can be used by multiple users and multiple services.”
In this blog post we will look at the details about the enterprise gateway and in particular:
- The Power BI Enterprise gateway configuration.
- How to publish SharePoint data to Power BI using the Power BI enterprise gateway
- The differences between the Power BI free and Power BI Pro SKUs.
- Power BI premium and shared capacity.
- Power BI SKUs and associated constraints.
Let’s see understand how the gateway works and walkthrough how to:
- Download and install the on-premises data gateway
- Add users to the gateway.
- Connect to data sources.
The functionality provided by the enterprise gateway is:
- Scheduled refresh of on-premises data, so Power BI reports are up to date.
Download and install the on-premises data gateway
Download the gateway
To install the gateway, you need to log in to the www.Powerbi.microsoft.com with your Office 365 credential and select Data Gateway menu under the Download menu.
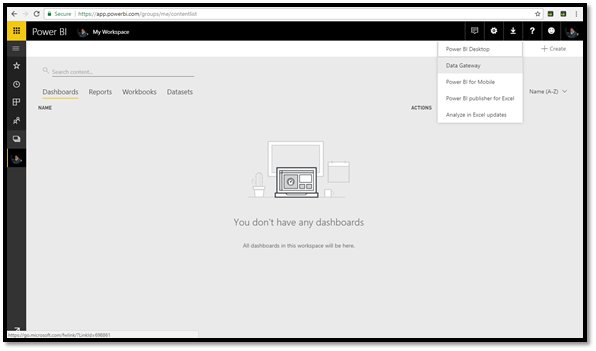
Once you click on the Data Gateway button you will be redirected to the Gateway page of Power BI, here you can find the details about the data gateway, you can click on the Download Gateway button to download the gateway.
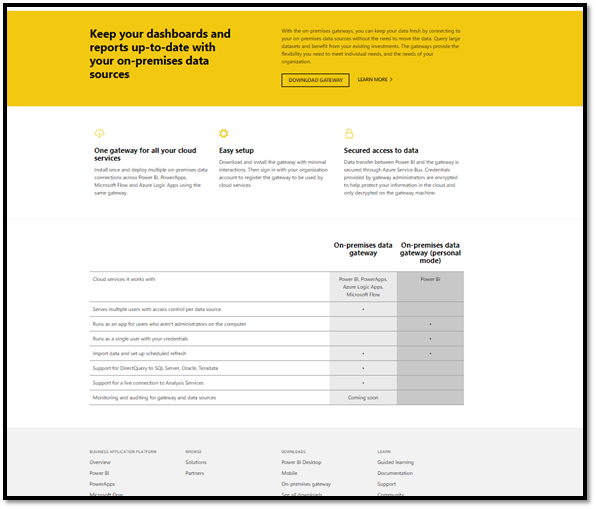
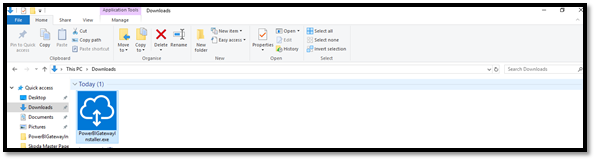
Once you click on the Download Gateway button, then the Power BI Gateway Installer will be downloaded.
Installation of the gateway
Once a user clicks on the Power BI Gateway Installer he/she will be redirected to the below screen.
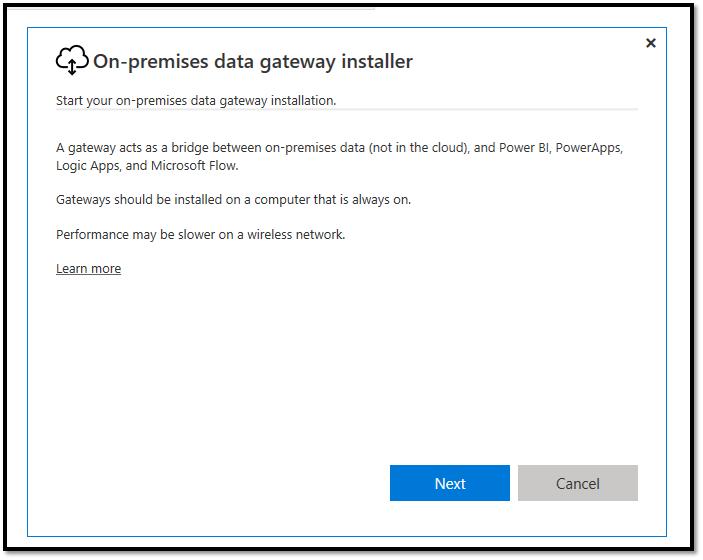
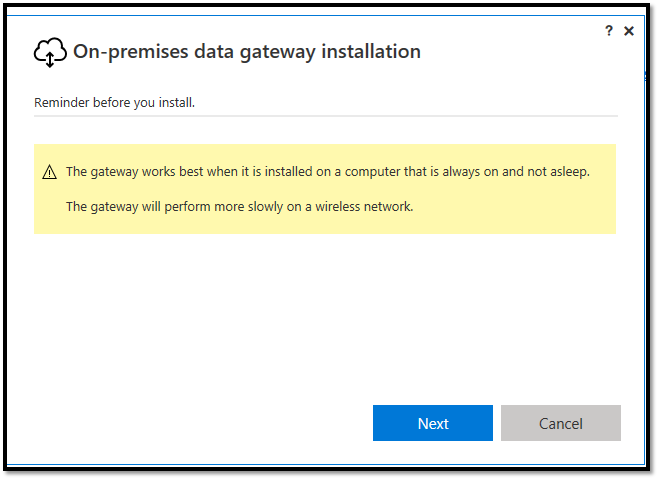
Important guidelines to keep in mind while installing the “On-Premise data gateway”
- The enterprise gateways should be installed on a computer that is always on.
- Performance may be slower on a wireless network.
Once a user clicks on the Next button he/she will be redirected to the Choose the type of gateway you need Screen.
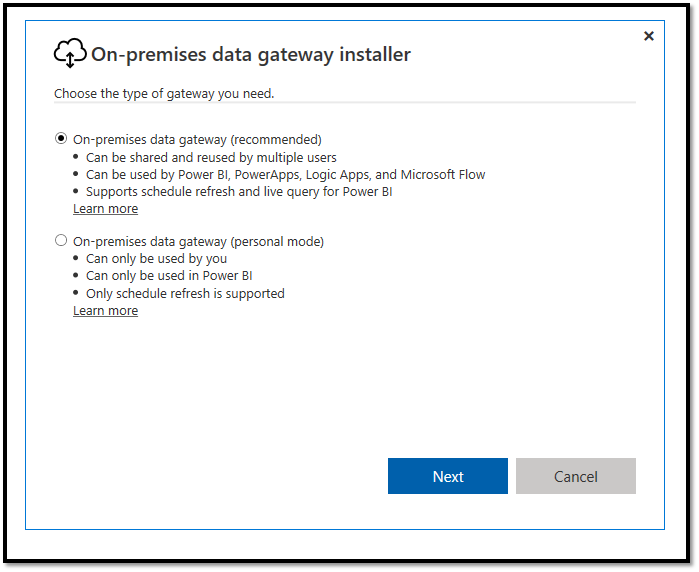
As mentioned above, there are two types of gateway.
-
On-premises data gateway (recommended)
- Can be shared and reused by the multiple users.
- Can be used by Power BI, PowerApps, Logic Apps and Microsoft Flow.
- Supports scheduled refresh and live query for Power BI.
-
On-premises data gateway (Personal Mode)
- Can only be used by you
- Can only be used in Power BI.
- Only scheduled refresh is supported.
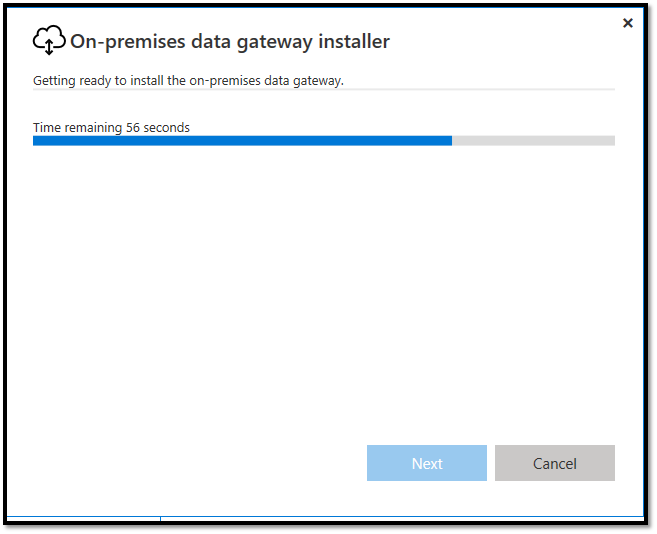
Once you click on the Next button, the machine will be prepared for the On-premises data gateway.
The On-premises data gateway installation warning
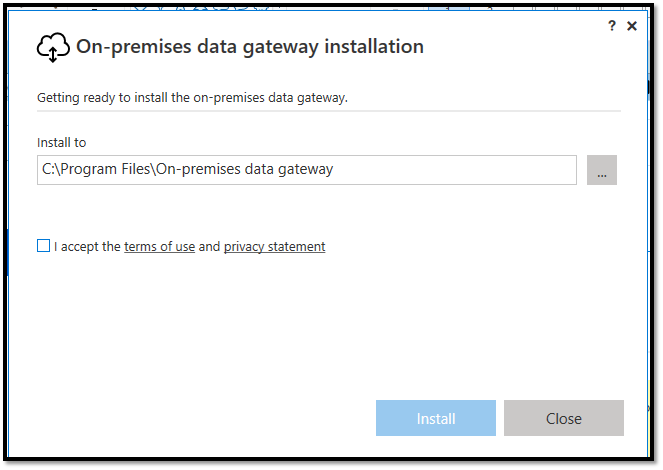
you can choose the installation location.
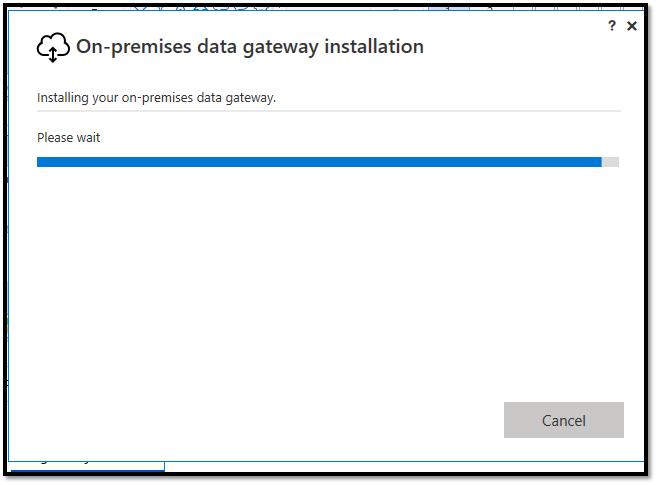
Installing your on-premises data gateway
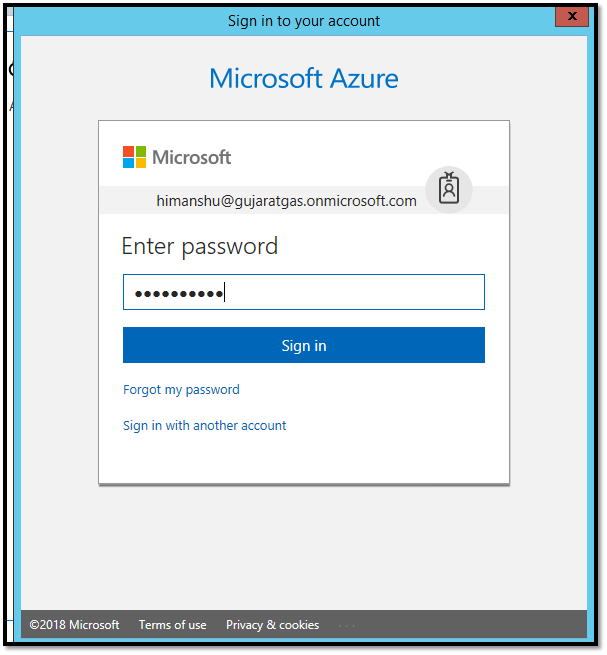
You need to sign in with your Office365 Email Address to register your gateway.

Password for the Microsoft email address.
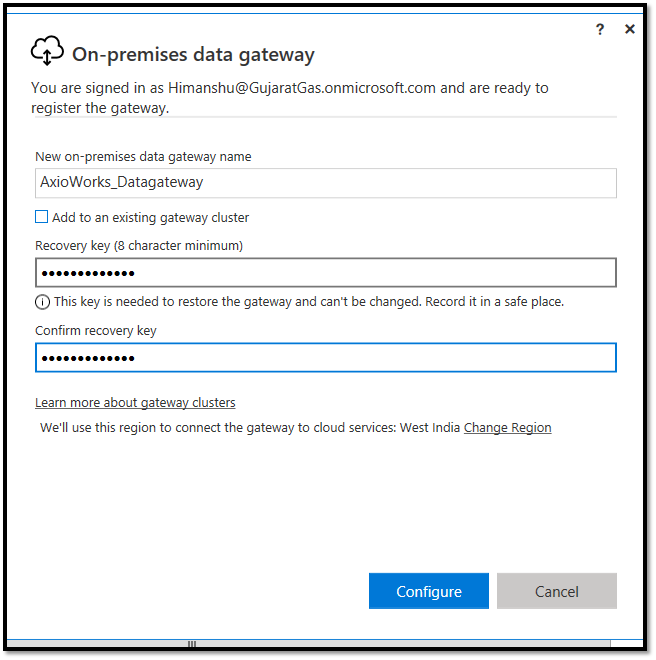
Once a user logs in, he/she will be redirected to the “Register the gateway” screen.
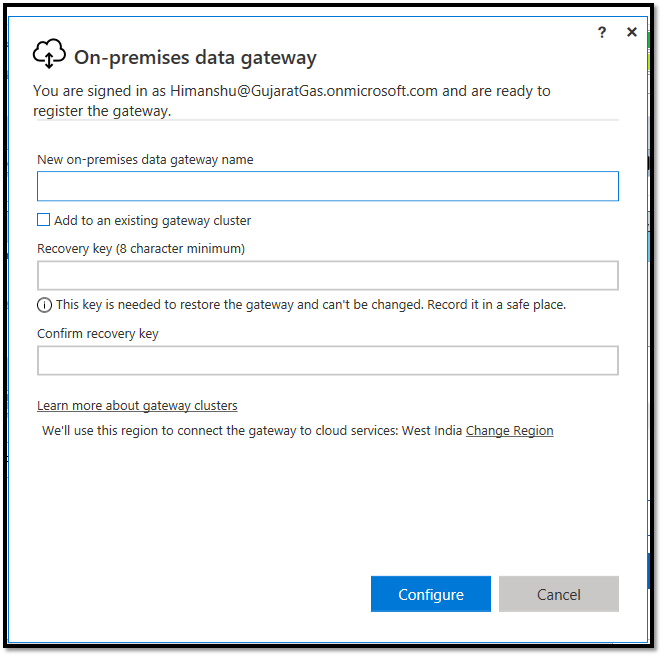
Here, you can enter the on-premises data gateway name and the recovery key.
once you click on the “configure” button, the gateway will be ready to use.
NOTE: The recovery key is needed to restore the gateway.

Understanding “Gateway clusters” and “Clustering the Power BI Data Gateway for high availability”
The gateway cluster is the combination of two or more gateways.
All gateway operations can apply to each gateway that is part of the cluster, for example:
- Adding a data source
- Granting administrative permissions etc.
Administrators are only able to see the list of registered gateway clusters or individual gateways but there is no direct functionality to see individual gateway instances that are parts of the cluster.
You need to write PowerShell scripts to fetch details about the individual instance of gateway under clusters along with their offline/online status.
Direct Query operations and Scheduled Refresh requests are automatically directed to the primary instance of a gateway cluster. if the primary gateway instance is not online, the request will be redirected to another gateway in the cluster.
The Gateway administrators can group various gateways to evade the single point of failure while accessing on-premises data resources.
The configuration of high availability clusters requires the November 2017 or later update to on-premises data gateway.
You need to provide the Recovery Key for the Primary gateway instance of the cluster while adding a gateway to an existing cluster.
There isn’t any way to configure clustering on an already installed Gateway application, you need to reinstall the same.
Below are the steps to “add new gateway into gateway clusters” or “to configure disaster recovery”
- Uninstall the Enterprise Gateway [if already installed] & Reinstall the same
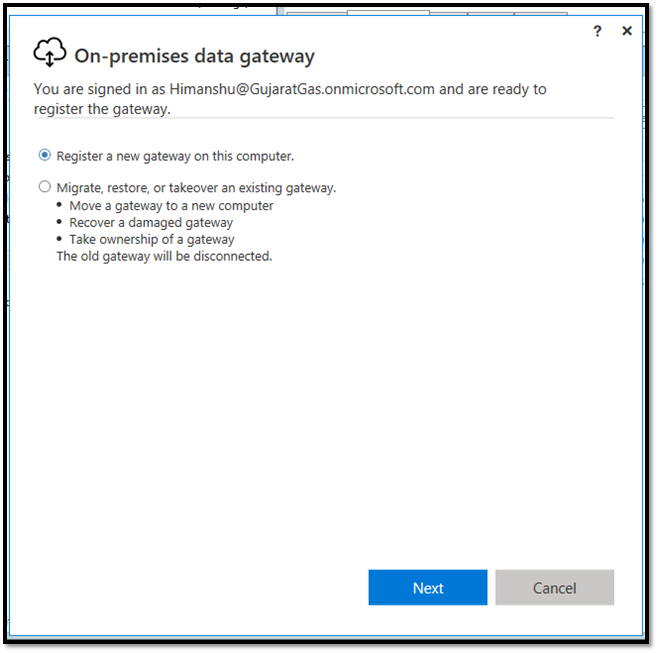
- Choose the option “Register a new gateway on this computer” when asked.
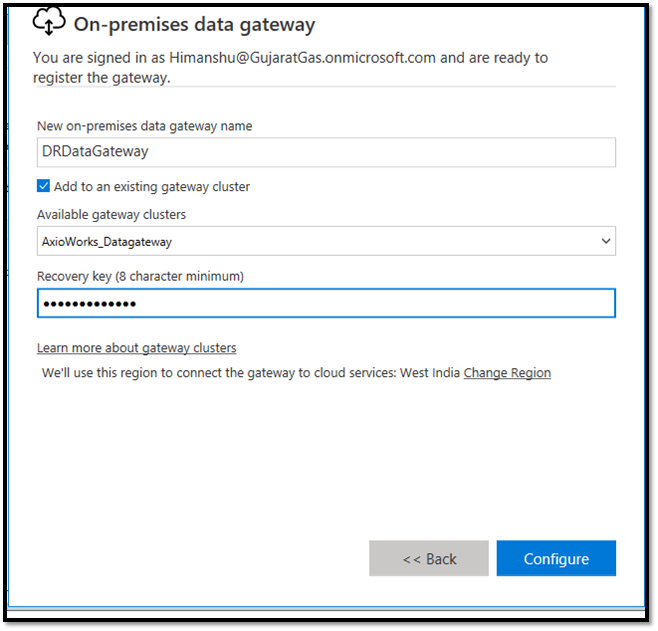
- Give new On-premises data gateway name.
- Tick the checkbox “Add to an existing gateway cluster”, select appropriate gateway cluster where you want to add this newly created Gateway (In the dropdown list, you will be able to see a list of available gateway clusters).
- Write Recovery key of the gateway or gateway cluster, you’re adding it to.
Create the Power BI Gateway and Add users to it
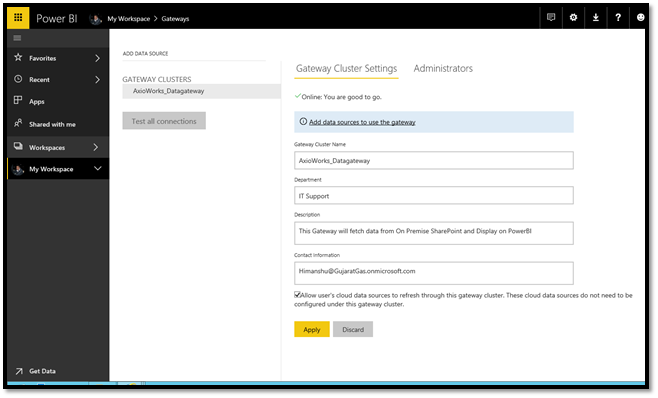
Once an on-premises enterprise gateway is installed on your machine, you can go to the Power BI Dashboard and find the gateway clusters. On this screen, you can configure the new gateway by adding the gateway order name, department, description, contact information and click on the Apply button.
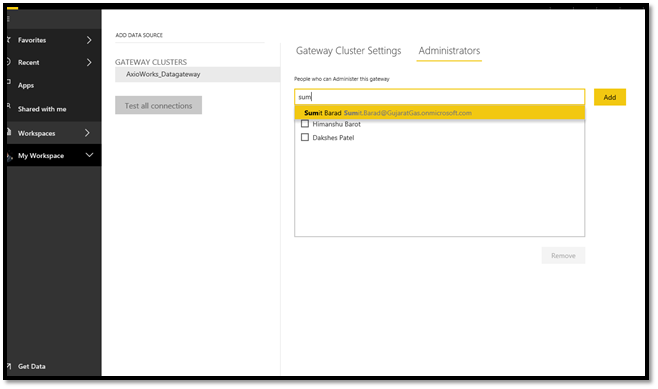
Add Administrator in the Gateway cluster.
Add and connect the data source (connection with the data source)
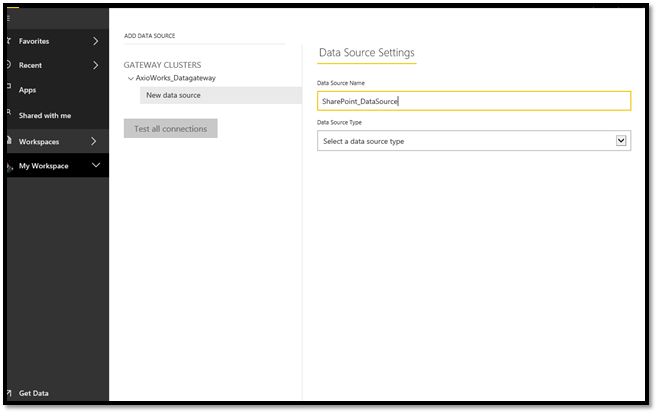
Add the data source inside gateway clusters.
A user can enter the data source name and data source type.
Below is the list of the data sources supported by the enterprise gateway
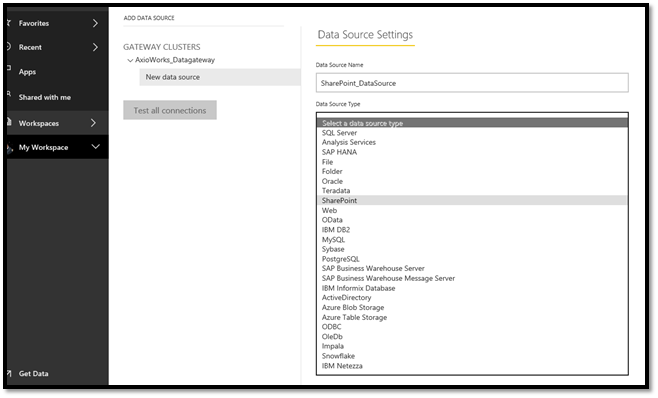
Create and configure the data source
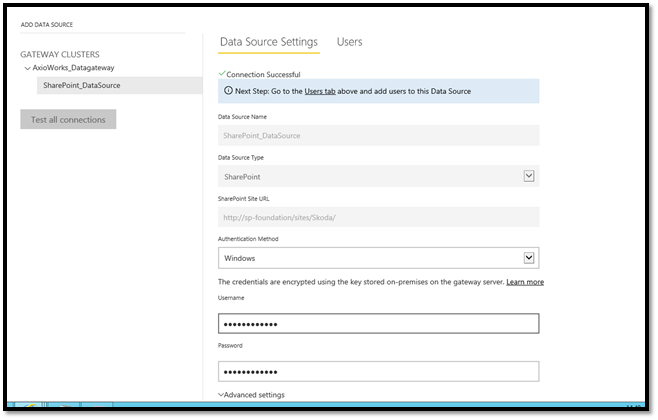
A user can create and configure the data source by adding the data source name, data source type, SharePoint site URL, authentication method, username, and password.
In this example, we have taken SharePoint as the data source type.
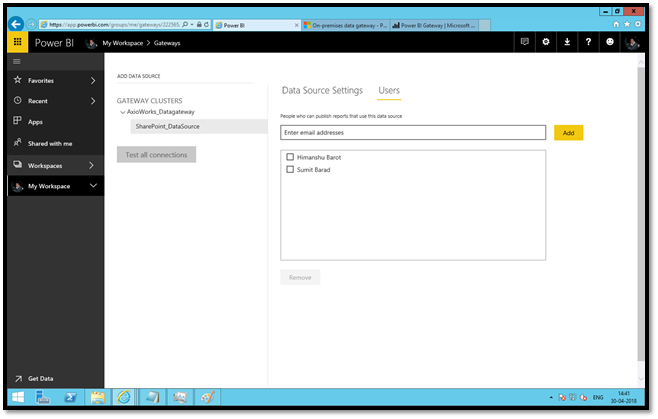
Add the users to the data source
Once the data source is configured, on this screen you can enter the usernames to provide access to the data source
.
How to publish SharePoint data to Power BI using the Enterprise gateway
An enterprise gateway acts as the bridge between the on-premises data (not in the cloud), and Power BI, PowerApps, Logic Apps and Microsoft flow.
Let’s take the example to understand it more clearly, here we will publish SharePoint data to the Power BI using the enterprise gateway and understand scheduled refresh activity as well.
The steps are as follows:
- Use the Power BI Desktop application to create a report by taking a SharePoint list as a data source and publish it.
- The setting for the enterprise gateway connection to choose an on-premise data gateway
- Configure scheduled refresh.
Use the Power BI Desktop application to create the report by taking a SharePoint list as a data source and publish it
First, download and open the Power BI desktop application and select the Get Data option to choose various data sources.
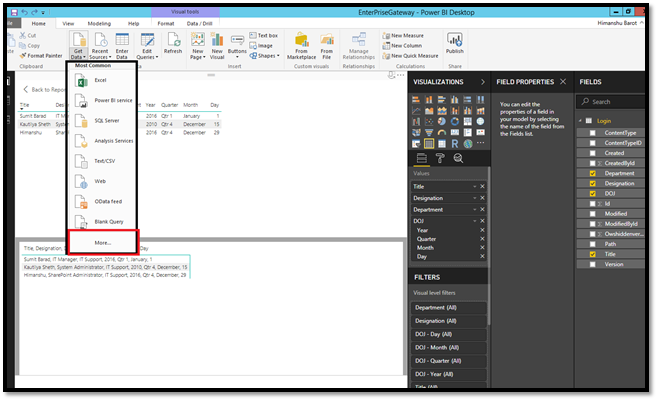
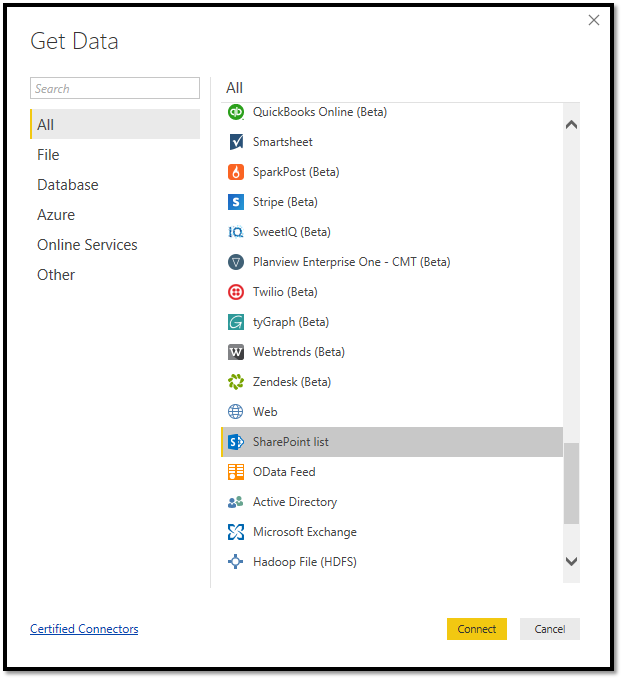
To choose a SharePoint list as the data source, you need to select the “More…” option to explore the list of more data sources. Select the “SharePoint List” as a data source and click on the “Connect” button.
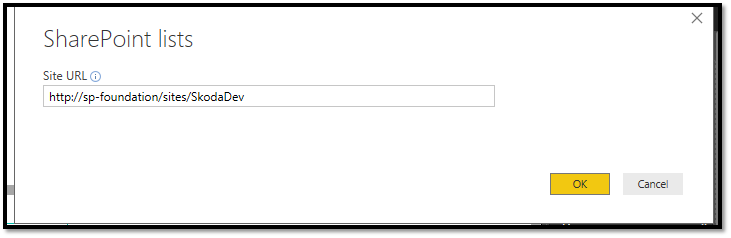
Once you click the “Connect” button, the site URL dialog box will open, in which you need to write the “SharePoint site URL” and click the “OK” button.
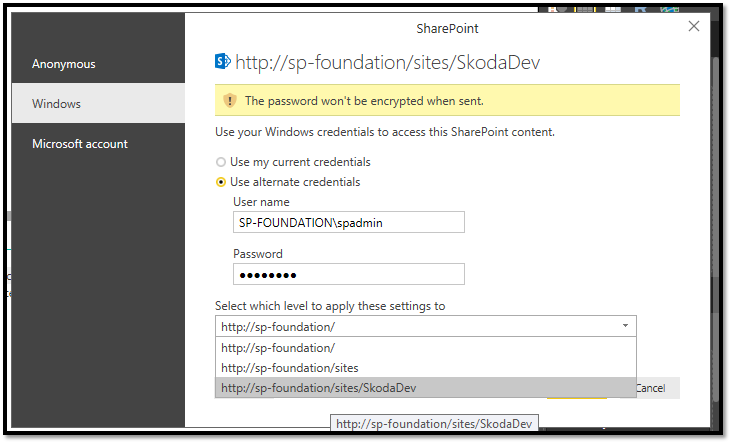
Once you click the OK button then a dialog box will open in which you need to select the SharePoint site level (i.e. either root site, site collection or subsite).To apply these settings and authentication information, You can either choose the Anonymous or the windows and Microsoft Account authentication.
In our case, it is “Windows” Authentication and chooses the “Use alternate credentials” option to authenticate with the SharePoint on-premise site.
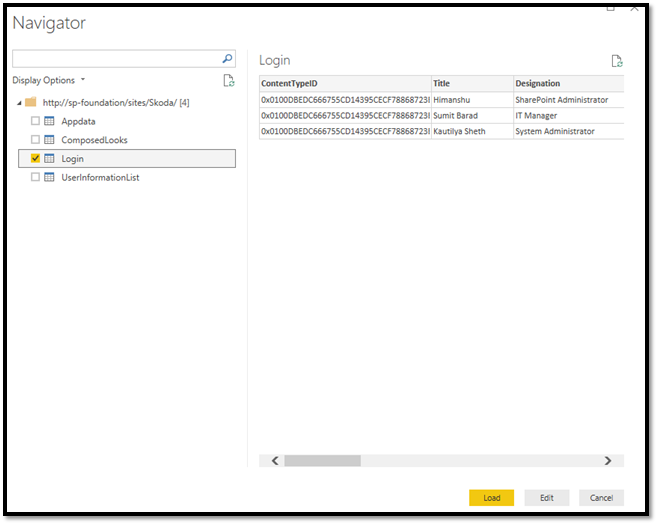
Once you click the “Ok” button, the “Navigator” dialog will open, where you can select the appropriate SharePoint list, which you want to use as a data source.
You can directly load it or edit the data before loading.
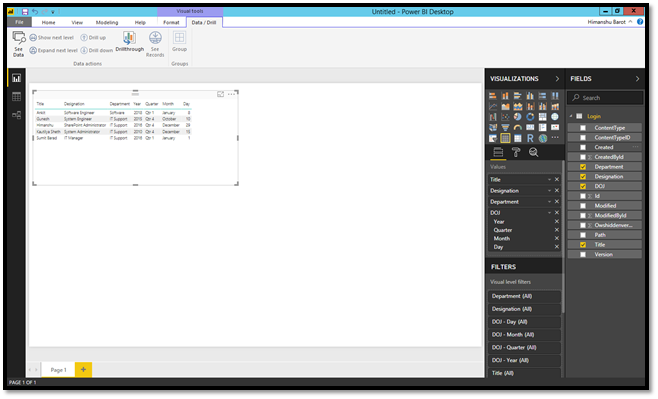
Once you click on the Load button then the SharePoint list data will be displayed as mentioned in the below screen, also here you can choose the relevant fields to display in the report and do other relevant settings like order modifications, apply filter etc.
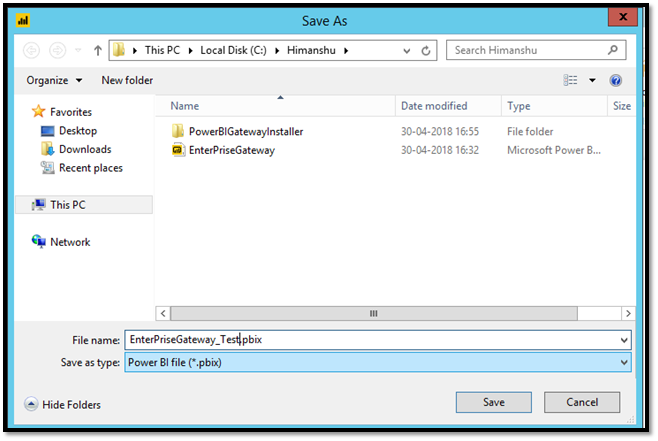
Once you have configured the report based on your requirement, you can now save the report.
Now, you can publish the report on your Power BI workspace. To publish the report, you need to click on the “Publish” button from the upper right corner.
Once you click on the “Publish” button, the “Publish to Power BI” dialog will open, here you can select your workspace.
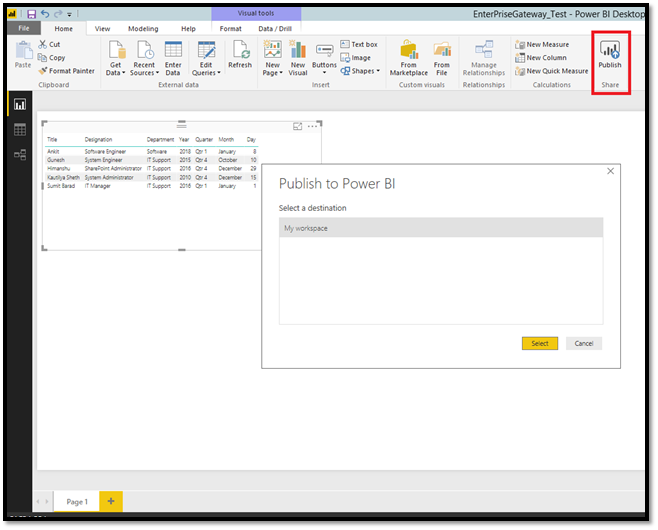
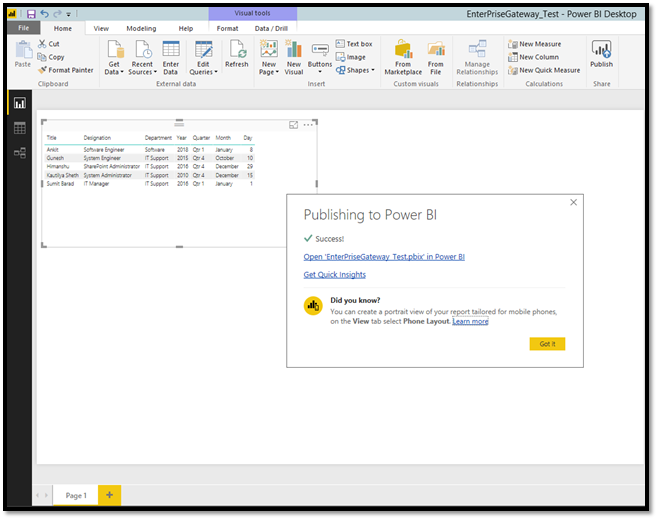
Once you select the appropriate workspace then the report will be published on the Power BI.
Since the report is published in Power BI, now let’s see the steps to be used for the enterprise gateway connection with the report.
The setting for the enterprise gateway connection to choose an on-premises data gateway
The gateway acts as the bridge between on-premise data (not in the cloud), and Power BI here.
Let’s see the procedure to establish the “enterprise gateway” connection with the report.
You can login to the Power BI Dashboard and go to the “Datasets” tab, here you can view the list of datasets published in the Power BI.
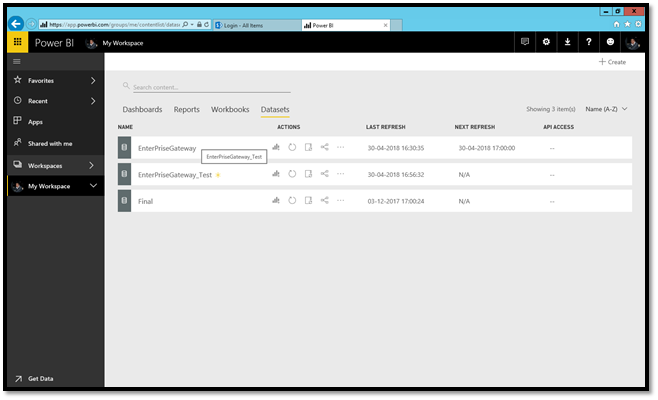
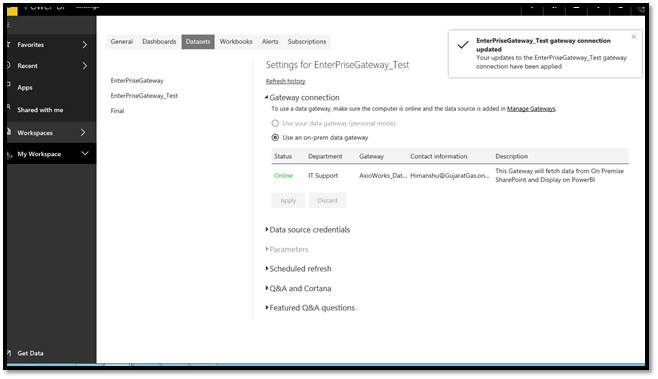
You can select any of the datasets and go to the settings, once you click on the Settings, below screen will open.
Here you can view the “on-premise data gateway” which you have created. Choose an appropriate On-premise data gateway and click on the “Apply” button.
Now, let’s see the steps on how to configure scheduled refresh of a report.
Configure scheduled refresh
The scheduled refresh option is used to keep the report data up-to-date. Once you have configured the scheduled refresh option, the Power BI will fetch the latest data from an On-premises data source in scheduled time.
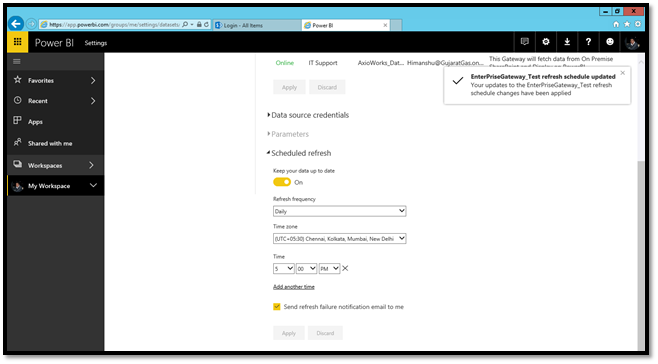
To configure the scheduled refresh, you can go to the “Scheduled refresh” tab in the setting page.
You need to turn on the “Keep your data up to date” option and choose refresh frequency to either make it daily and weekly, also choose Time Zone and configure Time.
You can configure the scheduled refresh more than once daily. The Power BI can do the scheduled refresh in every half hour interval.
The scheduled refresh limit is 8 refreshes/day for shared capacity users, however, the user can buy Power BI premium which removes the restriction on dataset sizes and refresh rates.
You can also configure the options to receive failure notification email.
Once you have configured all the options, click on the “Apply” button.
For an example, see the below screenshot before scheduled refresh, it displays Employee details.
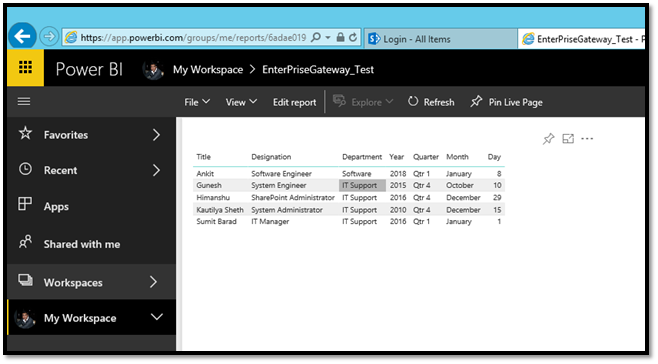
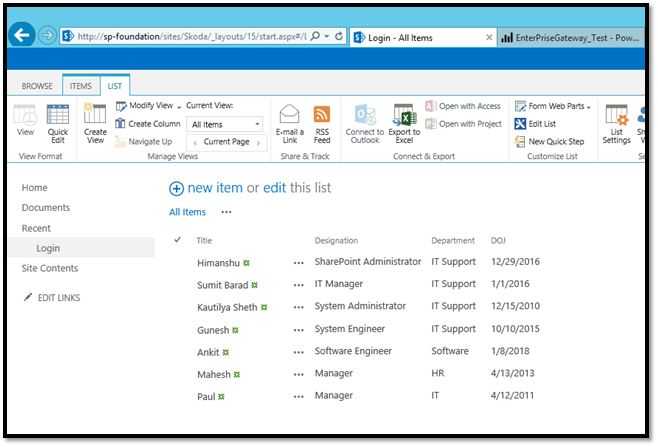
SharePoint Employee List, as you can see, here we have more records then it’s displayed on the Power BI report.
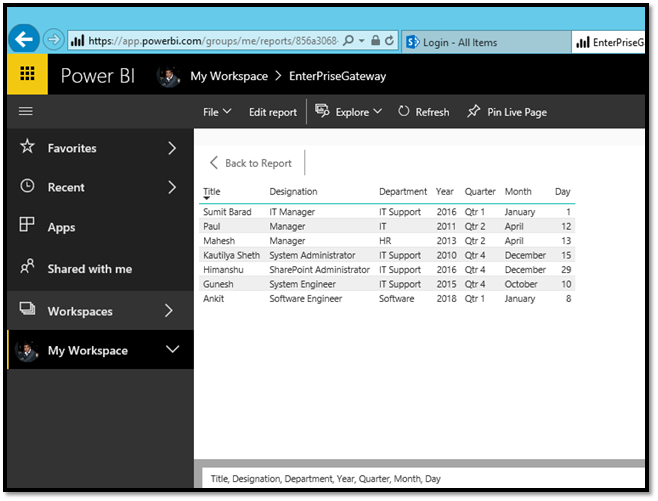
Once the scheduled refresh is completed, then the Power BI report data will be up to date.
Power BI Free vs. Power BI Pro
Let’s understand the core difference between the Power BI Free and the Power BI Pro, every user associated with the Power BI is either having a free or pro license.
The main difference between a free or pro user is sharing and collaboration.
The Pro user can
- Publish content in the app workspaces.
- Consume the apps without the premium capacity
- Share and subscribe to dashboards and reports.
While the free users can
- Connect to all the data sources via all the connectivity options such as Direct Query, live connection and the use of the data gateway.
- If an app workspace is assigned to the premium capacity then, the free users can consume those apps which are published in the workspace.
Free vs. Pro comparison
List of features supported by the user type.
| Features |
Free |
Pro |
| Connect to 70 + data sources |
yes |
yes |
| Publish to Web |
yes |
yes |
| Peer-to-Peer sharing |
no |
yes |
| Export to PowerPoint, Excel, CSV |
yes |
yes |
| Enterprise distribution | ||
| Apps |
no |
yes |
| Email subscriptions |
no |
yes |
| Embed APIs and controls |
no |
yes |
| Collaboration | ||
| Apps workspaces |
no |
yes |
| Analyse in Excel, Analyse in Power BI Desktop |
no |
yes |
Power BI Premium
Power BI Premium provides dedicated resources to run the Power BI service just for your organization which results in more dependable performance and larger data storage capacity.
Premium also help organizations with the large distribution of content without purchase per-user licenses for viewers.
To take advantage of Power BI premium, you need to assign workspaces to a premium capacity. As mentioned above, the premium capacity gives dedicated resources just for your organization, the workspaces which are not assigned to the premium capacity, those will come under the shared capacity, where resources are shared with the other organizations as well.
Individual users have more limitations with shared capacity, which ensure the overall quality experience of all users.
Listed below are the benefits of using premium capacity over shared capacity
| Premium Capacity | Shared Capacity |
| Accessing app workspaces (as members or admins) and publishing apps require a Power BI pro license. | Sharing requires a Pro license. Recipients also need Pro License in my workspace. |
| App readers can be free users as well. | Pro license requires using any app from app workspace. |
| Sharing requires a Power BI pro license but recipients can have any of them. | |
| Dashboard recipients can set data alert irrespective of their Power BI license. | |
| REST APIs for embedding using a service account with power BI Pro license, instead of a user. |
Capacity tiers
| Features |
Shared Capacity |
Premium Capacity |
| Refresh Rate |
8/day |
Not restricted |
| Isolation with dedicated hardware |
✖ |
✔ |
| Enterprise Distribution | ||
| Apps |
✖ |
✔ |
| Embedded API and controls |
✖ |
✔ |
| Publish Power BI Reports on-premises |
✖ |
✔ |
Important Note:
A free user can use below-mentioned features in Apps while using premium capacity
- Viewing content on web and mobile.
- Using Q&A.
- Quick insights.
- Cortana.
-
Export to CSV, Excel, and PowerPoint.
Pro license requires the below-mentioned features in Apps while using the premium capacity
- Creating the report on shared datasets and analyze in Excel.
Earlier, users were performing the scheduled refresh with imported models only 8x a day, now the same has been lifted for datasets in premium workspaces, but this does not apply to the schedule cache refresh settings for Direct Query. Those remain same between the premium and shared capacities.
Power BI Premium capacity nodes
The Power BI premium is available in node configurations with different v-core capacities.
- P nodes are used for embedded or service deployments.
- EM nodes can be used for embedded deployments only (EM1 and EM2).
The front-end v-cores are responsible for:
- Web service
- Dashboard and report document management
- Access right management
- Scheduling
- APIs
- Uploads and downloads
- User experience related things
The back-end v-cores are responsible for:
- Query processing
- Cache management
- Running R-servers
- Data refresh
- Natural language processing
- Real-time feeds
- Server-side rendering of reports and images
A certain amount of memory is reserved for the back-end v-cores to deal with large data models and in processing a large number of active datasets.
Now, you should be able to import your SharePoint on-premises data to Power BI using the enterprise gateway and always get the latest data using the scheduled refresh configuration. This blog also helps you to understand the comparison between the Power BI free and Power BI pro. Also, it helps you to understand the Power BI premium facility and details about the premium capacity nodes.