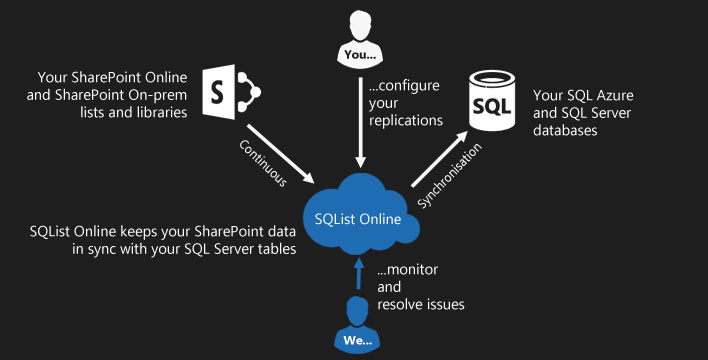
We have launched SQList Online! The cloud-based software as a service (SaaS) version of SQList, our on-prem application that makes it extremely easy for organizations to store and synchronize SharePoint On-prem/SharePoint Online data into SQL Server databases, allowing them to efficiently generate reports using their preferred reporting tools like Power BI, Excel, or SSRS by connecting directly to SQL tables.
In this article, we will take a look at how to set up your account for SQList Online and then how to set up your fist replication.

How to Setup replication
Open the SQList Online in your browser and then click on Create New Account.
*Please note that SQList Online is in beta at the time of writing this article.

Provide your details to create an account. Once done, log in using your email address and password.

Now, in order to create a new replication, we will first need to create a SharePoint and SQL connection.

Create a SharePoint connection by providing the URL of the SharePoint site and authentication details and then test to make sure the connection is successful.

Now, make sure you have already created a database in your SQL Server. Create a Database connection by providing the SQL Server information which holds the replication database and authentication details, and then test to make sure the connection is successful.

We are ready to create a replication. Click on Replications in the left-side menu and then create new replication.
Select the SharePoint connection.

Select the list’s in the SharePoint site which you want to be replicated in SQL database

Select the database connection which has the database which you want to use for replication.

Give your replication a meaningful name and then click Finish.

This will start the process of replication. You can view all the logs in the Service monitor.

That’s all, now you should be able to view your SharePoint Lists data in the SQL Database table.
